Showing posts with label Windows. Show all posts

7/16/2007

How not to get hacked

It's important to know how not to get hacked. The following details the layers of security you can place on your wireless network, as well as the effectiveness of each layer.
In some ways, securing a network is like the security on your home:
  • Leave the front door wide open. Seen by curious honest people and criminals alike as an open invitation to enter. See, it even says ‘Welcome’ on the doormat!
  • Shut the front door. This will keep out an honest person, but a crook wouldn’t be deterred, as they’ll walk right up and try the handle.
  • Lock the front door. This will again keep out the opportunist thief who will only try the door handle or climb in open a window to see if he can get it. Luckily most criminals fall into this category, so lock your door!
  • Bolt the door with deadbolts, bars on the windows, and alarms. It takes a lot more to keep out the determined criminal who, with a little equipment and know-how, might pick the lock, disable your alarm, or break your whole door down!
Wireless security falls into the same categories:

Leaving the door open: an open invitation
  • Broadcasting a default SSID
  • No MAC filtering
  • No encryption
  • DHCP switched on/No access controls
Shutting the door:
  • Changing the SSID (the name) of your network and disabling SSID broadcast. The determined hacker can discover this, so it merely protects you from the opportunist who’s in a hurry.
  • Disabling DHCP/Access Control. This will not stop a hacker with even minimal knowledge, as there are many tools which will sniff out available IP addresses on your network
  • MAC address filtering. A hacker with only a little know-how will be able to clone your MAC address--and see everything you see on your network.
Locking the door
  • WEP: Wireless Encryption Protocol can be hacked in seconds using free tools that are widely available.
Bolting the door

WPA: A randomized pre-shared key of at least 10 characters would take half-a-million years to crack. More info about this here. (Note: A random key means that it shouldn’t be a word that exists in any dictionary (hackers have extensive dictionaries that include all common passwords, English words, nicknames, and misspellings of words. This is called a “dictionary attack.”) A random key is a meaningless mix of lower- and uppercase letters and numbers, and sometimes special characters like punctuation, depending on whether your router supports it). If you’re not sure how to get a random key, you can generate a simple WPA key online on this Web site or a more complex one here. You can also get software that will generate a key for you (type “software generate wpa key” into your favorite search engine).

It’s best to build up each type of security in layers, checking that all devices can connect and communicate at each step before adding another layer. Make sure you read your router’s manual to ensure you’re storing the settings correctly (some routers require you to save the settings each time you make a change or the changes will be lost).

5/29/2007

The Windows Vista Firewall

We all have heard at one time or another, about the Windows XP firewall and how useless it is. However true or untrue these statements are, they can effect the confidence of future Windows products security systems. This paper is intent upon educating the public on the facts of the subject matter. So, let's get with it...

The Difference:-
No third party software can lay claim to the fact that the Windows Firewall starts its protection once the computer is turned on. Is that important you ask? Absolutely. If a capable malware program could turn itself on at the same time that the computer starts to boot, common sense would dictate the danger of this. Now, knowing the fact that the Vista firewall 'does' start at boot, we need to confidently know that it is going to protect from boot.

The Interface:-
Microsoft and the Windows team have done something a little different with the Vista firewall. They have separated the firewall in to two different interfaces. The default interface is the basic one. At first glance, it looks identical to the Windows XP SP2 firewall. This basic interface is ON by default and loads basic settings for normal user protection. In most cases, this basic setting should work fine. Then they added an Advanced interface for the more security savvy individuals. This Advanced interface gives a greater flexibility over the firewalls settings.

The Basic Configuration:-
As I mentioned earlier, the Vista firewall is turned on by default and will be set to a 'basic' configuration. In this configuration, the firewall works in tandem with the new Windows Service Hardening feature. If the firewall should detect a certain activity that is deemed a prohibited behavior according to the Windows Service Hardenings preset rules, the firewall will block this suspect activity.
To access the Vista Firewalls basic settings; Click the Windows button>> Control Panel>> Windows Firewall. With the Windows Firewall window open, you will see three tabs at the top; General, Exceptions and Advanced. Let's quickly discuss each tab separately:

General tab:-
With this tab selected, you will see three possible settings; On (default), Block all programs and Off. The on and off selections are pretty self-explanatory, but the "Block all programs" option is very handy if you need to login to an unsecure public wi-fi network. With this option selected in this scenario, you will be completely protected.

Exceptions tab:-
With this tab selected, you can view all of the programs that Windows has on its default block list. If you would like to unblock a certain program, just simply click the checkbox next to the programs name. Also, at the bottom of this window you will notice that you can add or delete programs. A little further down the window, you will notice an entry titled: "Tell me when Windows Firewall blocks a program". This is enabled by default, but if you would prefer not to get popup notifications regarding blocked programs, simply de-select this option and click Apply.

Advanced tab:-
With this tab selected, you will see the available network connections on your system that can be protected by the Windows Firewall. When you see a checkmark next to the available network connection, you'll know that it is being protected. Unchecking, of course, removes the protection.
Also available under the Advanced tab is a "Security logging" feature. When you click the "Settings" button under the Security logging feature, you will be able to create and configure log files of either dropped packets or successful connections to your network and set maximum log sizes.
Another feature you'll notice is "ICMP" (Internet Control Message Protocol):
Here you are given a certain flexibility over how your computer is to respond to ICMP requests. When you click the Settings button, you will notice that the entry titled: "Allow incoming echo request" is the only entry selected (allowed). All other requests are not allowed by default.
The last available option under the Advanced tab is the "Default settings" options. When you click the "Restore Defaults" button, you will remove any previous settings changes that have been made and return the Windows Firewall back to its Default configuration. If you should get in to a little trouble while configuring your Basic settings, this is a good option to be aware of.

The Advanced Configuration:-
This is where Microsoft has added a second completely separate interface for the Windows Firewall. In order to view and configure advanced settings, you will first need to create a custom MMC (Microsoft Management Console). The purpose for this is to dissuade any novice users from accessing these settings. If you would like to create a custom MMC, here's how:
  1. Click the Windows button
  2. In the Search box, enter: cmd
  3. Right click the Run Program and select "Run as administrator" from the resulting menu.
  4. In the Run window, type in: mmc.exe [Enter] or click OK.
  5. With MMC open, go to File>> Add/Remove Snap-in.
  6. Open the "Available Snap-ins" list and scroll the list to locate an entry titled: "Windows Firewall With Advanced Security".
  7. Click to select the entry and then click the "Add" button.
  8. Accept the default (Local Computer) from the Select Computer dialog box.
  9. Click Finish, then OK.
You will now be able to view the advanced settings in the MMC.

From within the MMC, you have a great deal of flexibility over your Windows Firewall. Some interesting configurations worth noting are:

Multiple Firewall Profiles:-
More geared around portable computing, this available option allows you to configure three different profiles for different situations. As an example, if your are traveling and are using your laptop in a public unsecured wi-fi environment, you can enable your "Public" profile. Switch to your "Private" network configured profile when surfing at home, or rely upon your "Domain" configured profile for work. Each profile tab has the same available settings changes available.
Once you've clicked one of the profile tabs, you can turn the selected profile On or Off. You also have the flexibility over Inbound and Outbound connections. By default as we have learned earlier, outbound connections are allowed and Inbound connections are NOT allowed (selected 'exceptions' are allowed). In the MMC, you can change these settings to fit your personal needs.

IPSec Configuration:-
Another tab you'll see along side each of the three profiles is the IPSec tab. IPSec (Internet Protocol Security) is a constantly developing security standard that provides for security of sensitive data that is transmitted over unprotected networks. With the IPSec tab selected, you can click the "Custom" button to configure these settings to fit your needs. Available configuration options are: Key Exchange, Data Protection and Authorization Method.

Connection Security Rules:-
After you have setup all of your profiles and configured your IPSec settings, you're now ready to setup your connection security rules. You will be guided by a wizard that helps you create security rules to determine how and when secure connections are to be applied between an individual computer or even a group of computers. Some of the flexibilities you will have here are:
  • Isolate certain connections and restrict a connection based on a domains membership or health status.
  • Set up server-to-server authentication rules
  • Restrict certain connections
  • Exemplify certain computers from authentication
  • Create a custom rule when nothing available applies
Once you've created your rules, you can easily delete them by right clicking and selecting Delete. Or, you can save them for a later time by selecting Disable instead. To enable the disabled rule, simply right click it and select Enable.

5/08/2007

Windows Media Player 10 Keyboard Shortcuts

Hide the menu : ALT
Zoom to 50 percent : ALT+1
Zoom to 100 percent : ALT+2
Zoom to 200 percent : ALT+3
Show or hide album information in the Rip feature : ALT+A
Start burning a CD in the Burn feature : ALT+B
Rip music from a CD to your computer in the Rip feature : ALT+C
Show video in full screen : ALT+ENTER
Show the File menu : ALT+F
Quit the program in the current window : ALT+F4
Show the anchor window menu : ALT+F6, ALT
Show the Help menu : ALT+H
Show or hide album information in your library : ALT+I
Save a new or changed playlist to your library : ALT+L, A
Show a list of items to burn to CD in the List pane in your library : ALT+L, B
Select the columns to be shown in your library : ALT+L, C
Show a playlist from your library in the List pane. : ALT+L, E
Shuffle items in the List Pane in your library : ALT+L, H
Create a playlist or auto playlist in the List pane in your library : ALT+L, N
Show or hide the List pane in your library : ALT+L, S
Edit items in the List pane by using the Edit Playlist dialog box in your library : ALT+L, U
Activate double-clicking to add selected items to the List pane in your library : ALT+O, A
Show a list of items to burn to CD in the List pane in your library : ALT+O, B
Select the columns to be shown in your library : ALT+O, C
Select items in the Details pane of your library that contain media information for the selected sort order : ALT+O, G
Activate double-clicking to play only selected items in a playlist in your library. : ALT+O, I
Activate double-clicking to play all items in a playlist in your library : ALT+O, P
Play items in the Now Playing list repeatedly in your library : ALT+O, R
Show or hide the List pane in your library : ALT+O, S
Show a list of items to play in the List pane in your library : ALT+O, W
Show the Play menu : ALT+P
Search for items in your library that include the text in the Search box : ALT+S
Restore the Player from mini Player mode : ALT+SHIFT+P
Show the Tools menu : ALT+T
Show the View menu : ALT+V
Go to the Features taskbar features : ALT+V, G
Move left or right or up or down on menus or lists : Arrow keys
Switch to full mode : CTRL+1
Switch to skin mode : CTRL+2
Select or clear check boxes for multiple items that are not contiguous : CTRL+arrow keys, SPACEBAR
Play the previous item : CTRL+B
Edit the current playlist on the File menu : CTRL+D
Eject the CD or DVD on the Play menu : CTRL+E
Play the next item : CTRL+F
Shuffle the playlist on the Play menu or the Skin shortcut menu : CTRL+H
Capture a still image from a DVD on the View menu : CTRL+I
Show the menu bar in full mode : CTRL+M
Create a playlist on the File menu : CTRL+N
Open a file on the Skin shortcut menu or the File menu : CTRL+O
Play or pause a file : CTRL+P
Stop playback : CTRL+S
Rewind (not available for all files) : CTRL+SHIFT+B
Turn captions and subtitles on or off : CTRL+SHIFT+C
Play faster than normal speed (time compression) : CTRL+SHIFT+G
Play slower than normal speed (time expansion) : CTRL+SHIFT+S
Repeat the playlist : CTRL+T
Switch between the inner and outer areas of the Player : CTRL+TAB
Specify either a URL or path of a file : CTRL+U
Close or stop playing a file on the File menu : CTRL+W
Delete a selected item in the Sync feature : DELETE
Select the next item in the list : DOWN ARROW
Play an item : ENTER
Hide the menu : ESC
Open Help : F1
Search specified locations for digital media files : F3
Refresh the information in the panes in the Sync feature : F5
Mute the volume : F8
Decrease the volume : F9
Select or clear contiguous check boxes : SHIFT+arrow keys, SPACEBAR
Show the shortcut menu for the selected item : SHIFT+F10
Select the previous area : SHIFT+TAB
Select or clear a check box : SPACEBAR
Select the next area : TAB
Select the previous item in the list : UP ARROW
Thanks for Windows Media.

FAT32 ( File Allocation Table 32 )

What is this FAT32 I keep hearing about?
FAT32 is a new feature introduced by Microsoft to reduce wasted cluster space. You can find FAT 32 in the OSR2 version of Windows 95.

What is the difference between FAT16 & FAT32?
Inside every hard drive, there are clusters. The larger the partition, the bigger the cluster size. Many people resort to partition their hard drive into smaller partitions to reclaim wasted cluster disk space. FAT32 reduces the cluster size so you don't have to partition your hard drive to save disk space. The table below shows the difference:
FAT16

Cluster size

Partition Size

2 KB

128 MB

4 KB

256 MB

8 KB

512 MB

16 KB

1 GB

32 KB

2 GB


FAT32

Cluster size

Partition Size

2 KB

<>

4 KB

260 MB - 8 GB

8 KB

8 GB - 16 GB

16 KB

16 GB - 32 GB

32 KB

32 GB<


As you can see, the maximum partition size under FAT16 is only 2 GB while FAT32 supports up to 32GB. And also, the cluster size for a 2GB partition is 32 KB while a partition between 260 MB to 16 GB ( for home or personal use range ) 's cluster size is 4 KB, saving nearly 8 times less cluster space than a partition that is under FAT16.

Does that means that I will have FAT32 installed if I have OSR2?

Yes and no. It depends on how your OSR2 was installed. If installed from the setup disk ( included in your package ) then setup will format your hard drive leaving you with a FAT32 hard drive. But if OSR2 is installed from DOS or the earlier version of Windows 95, then you will be using the old FAT16.

I have a copy of OSR2. What is the most common way to convert my hard drive to support FAT32?
The most common way is to format the whole hard drive. Boot to command prompt and run setup from the OSR2 CD. Go along setup until you are prompted to make a boot disk. Insert an empty disk and label it OSR2 boot disk. Then, cancel setup. Now boot your PC from the boot disk. Format the hard drive from the boot disk using the format command. (Note: Do not use the /q switch as it will just erase all data. Use full format.) After your hard drive is formatted, it will support FAT32.

Is there any other way I can convert FAT16 to FAT32 without formatting my hard drive?
Yes, by using some third party software or utilities.

What are the utilities that can convert FAT16 to FAT32?
Microsoft has released one that is currently available at the Microsoft site. Powerquest also have developed one as part of Partition Magic. We believe there are also other FAT32 conversion utilities on the Internet written by shareware of freeware authors. Also, Windows 98 ships with a FAT32 converter.

Can I install OSR2 on a FAT16 partition/drive?
OSR2 does not need FAT32 to be installed. OSR2 will run happily on any FAT16 partition / drive.

5/07/2007

Windows Registry FAQ

What is the Registry?
The Registry is a database used to store settings and options for the 32 bit versions of Microsoft Windows including Windows 95, 98, ME and NT/2000. It contains information and settings for all the hardware, software, users, and preferences of the PC. Whenever a user makes changes to a Control Panel settings, or File Associations, System Policies, or installed software, the changes are reflected and stored in the Registry.
The physical files that make up the registry are stored differently depending on your version of Windows; under Windows 95, 98 & ME it is contained in two hidden files in your Windows directory, called USER.DAT and SYSTEM.DAT, while under Windows NT/2000 the files are contained separately in the %SystemRoot%\System32\Config directory. You can not edit these files directly, you must use a tool usually known as a "Registry Editor" to make any changes (using registry editors will be discussed later in the article).

The Structure of the Registry
The Registry has a hierarchal structure, although it looks complicated the structure is similar to the directory structure on your hard disk, with Regedit being similar to Windows Explorer.


Each main branch (denoted by a folder icon in the Registry Editor, see left) is called a Hive, and Hives contains Keys. Each key can contain other keys (sometimes referred to as sub-keys), as well as Values. The values contain the actual information stored in the Registry. There are three types of values; String, Binary, and DWORD - the use of these depends upon the context.


There are six main branches, each containing a specific portion of the information stored in the Registry. They are as follows:
  • HKEY_CLASSES_ROOT - This branch contains all of your file association types, OLE information and shortcut data.
  • HKEY_CURRENT_USER - This branch links to the section of HKEY_USERS appropriate for the user currently logged onto the PC.
  • HKEY_LOCAL_MACHINE - This branch contains computer specific information about the type of hardware, software, and other preferences on a given PC, this information is used for all users who log onto this computer.
  • HKEY_USERS - This branch contains individual preferences for each user of the computer, each user is represented by a SID sub-key located under the main branch.
  • HKEY_CURRENT_CONFIG - This branch links to the section of HKEY_LOCAL_MACHINE appropriate for the current hardware configuration.
  • HKEY_DYN_DATA - This branch points to the part of HKEY_LOCAL_MACHINE, for use with the Plug-&-Play features of Windows, this section is dymanic and will change as devices are added and removed from the system.

Each registry value is stored as one of five different data types:

  • REG_BINARY - This type stores the value as raw binary data. Most hardware component information is stored as binary data, and can be displayed in an editor in hexadecimal format.
  • REG_DWORD - This type represents the data by a four byte number and is commonly used for boolean values, such as "0" is disabled and "1" is enabled. Additionally many parameters for device driver and services are this type, and can be displayed in REGEDT32 in binary, hexadecimal and decimal format, or in REGEDIT in hexadecimal and decimal format.
  • REG_EXPAND_SZ - This type is an expandable data string that is string containing a variable to be replaced when called by an application. For example, for the following value, the string "%SystemRoot%" will replaced by the actual location of the directory containing the Windows NT system files. (This type is only available using an advanced registry editor such as REGEDT32)
  • REG_MULTI_SZ - This type is a multiple string used to represent values that contain lists or multiple values, each entry is separated by a NULL character. (This type is only available using an advanced registry editor such as REGEDT32)
  • REG_SZ - This type is a standard string, used to represent human readable text values.
Editing the Registry
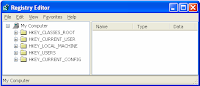
The Registry Editor (REGEDIT.EXE) is included with most version of Windows (although you won't find it on the Start Menu) it enables you to view, search and edit the data within of the Registry. There are several methods for starting the Registry Editor, the simplest is to click on the Start button, then select Run, and in the Open box type "regedit", and if the Registry Editor is installed it should now open and look like the image below.
An alternative Registry Editor (REGEDT32.EXE) is available for use with Windows NT/2000, it includes some additional features not found in the standard version, including; the ability to view and modify security permissions, and being able to create and modify the extended string values REG_EXPAND_SZ & REG_MULTI_SZ. Create a Shortcut to Regedit
This can be done by simply right-clicking on a blank area of your desktop, selecting New, then Shortcut, then in the Command line box enter "regedit.exe" and click Next, enter a friendly name (e.g. 'Registry Editor') then click Finish and now you can double click on the new icon to launch the Registry Editor.

Using Regedit to modify your Registry
Once you have started the Regedit you will notice that on the left side there is a tree with folders, and on the right the contents (values) of the currently selected folder.

Like Windows explorer, to expand a certain branch (see the structure of the registry section), click on the plus sign [+] to the left of any folder, or just double-click on the folder. To display the contents of a key (folder), just click the desired key, and look at the values listed on the right side. You can add a new key or value by selecting New from the Edit menu, or by right-clicking your mouse. And you can rename any value and almost any key with the same method used to rename files; right-click on an object and click rename, or click on it twice (slowly), or just press F2 on the keyboard. Lastly, you can delete a key or value by clicking on it, and pressing Delete on the keyboard, or by right-clicking on it, and choosing Delete.

Note: it is always a good idea to backup your registry before making any changes to it. It can be intimidating to a new user, and there is always the possibility of changing or deleting a critical setting causing you to have to reinstall the whole operating system. It's much better to be safe than sorry!

Importing and Exporting Registry Settings
A great feature of the Registry Editor is it's ability to import and export registry settings to a text file, this text file, identified by the .REG extension, can then be saved or shared with other people to easily modify local registry settings. You can see the layout of these text files by simply exporting a key to a file and opening it in Notepad, to do this using the Registry Editor select a key, then from the "Registry" menu choose "Export Registry File...", choose a filename and save. If you open this file in notepad you will see a file similar to the example below:

REGEDIT4
[HKEY_LOCAL_MACHINE\SYSTEM\Setup]
"SetupType"=dword:00000000
"CmdLine"="setup -newsetup"
"SystemPrefix"=hex:c5,0b,00,00,00,40,36,02

The layout is quite simple, REGEDIT4 indicated the file type and version, [HKEY_LOCAL_MACHINE\SYSTEM\Setup] indicated the key the values are from, "SetupType"=dword:00000000 are the values themselves the portion after the "=" will vary depending on the type of value they are; DWORD, String or Binary.

So by simply editing this file to make the changes you want, it can then be easily distributed and all that need to be done is to double-click, or choose "Import" from the Registry menu, for the settings to be added to the system Registry.

Deleting keys or values using a REG file
It is also possible to delete keys and values using REG files. To delete a key start by using the same format as the the REG file above, but place a "-" symbol in front of the key name you want to delete. For example to delete the [HKEY_LOCAL_MACHINE\SYSTEM\Setup] key the reg file would look like this:
REGEDIT4
[-HKEY_LOCAL_MACHINE\SYSTEM\Setup]

The format used to delete individual values is similar, but instead of a minus sign in front of the whole key, place it after the equal sign of the value. For example, to delete the value "SetupType" the file would look like:

REGEDIT4
[HKEY_LOCAL_MACHINE\SYSTEM\Setup]
"SetupType"=-

Use this feature with care, as deleting the wrong key or value could cause major problems within the registry, so remember to always make a backup first

Regedit Command Line Options
Regedit has a number of command line options to help automate it's use in either batch files or from the command prompt. Listed below are some of the options, please note the some of the functions are operating system specific

regedit.exe [options] [filename]

filename Import .reg file into the registry
/s Silent, i.e. hide confirmation box when importing files
/e Export registry file
e.g. regedit /e file.reg HKEY_USERS\.DEFAULT
/L:system Specify the location of the system.dat to use
/R:user Specify the location of the user.dat to use
/C Compress [filename] (Windows 98

Maintaining the Registry
How can you backup and restore the Registry

Windows 95
Microsoft included a utility on the Windows 95 CD-ROM that lets you create backups of the Registry on your computer. The Microsoft Configuration Backup program, CFGBACK.EXE, can be found in the \Other\Misc\Cfgback directory on the Windows 95 CD-ROM. This utility lets you create up to nine different backup copies of the Registry, which it stores, with the extension RBK, in your \Windows directory. If your system is set up for multiple users, CFGBACK.EXE won't back up the USER.DAT file.
After you have backed up your Registry, you can copy the RBK file onto a floppy disk for safekeeping. However, to restore from a backup, the RBK file must reside in the \Windows directory. Windows 95 stores the backups in compressed form, which you can then restore only by using the CFGBACK.EXE utility

Windows 98
Microsoft Windows 98 automatically creates a backup copy of the registry every time Windows starts, in addition to this you can manually create a backup using the Registry Checker utility by running SCANREGW.EXE from Start Run menu

What to do if you get a Corrupted Registry
Windows 95, 98 and NT all have a simple registry backup mechanism that is quite reliable, although you should never simply rely on it, remember to always make a backup first

Windows 95
In the Windows directory there are several hidden files, four of these will be SYSTEM.DAT & USER.DAT, your current registry, and SYSTEM.DAO & USER.DAO, a backup of your registry. Windows 9x has a nice reature in that every time it appears to start successfully it will copy the registry over these backup files, so just in case something goes wrong can can restore it to a known good state. To restore the registry follow these instruction:

1.Click the Start button, and then click Shut Down

2.Click Restart The Computer In MS-DOS Mode, then click Yes.

3.Change to your Windows directory. For example, if your Windows directory is c:\windows, you would type the following:

cd c:\windows

4.Type the following commands, pressing ENTER after each one. (Note that SYSTEM.DA0 and USER.DA0 contain the number zero.)

attrib -h -r -s system.dat
attrib -h -r -s system.da0
copy system.da0 system.dat
attrib -h -r -s user.dat
attrib -h -r -s user.da0
copy user.da0 user.dat

5.Restart your computer

Following this procedure will restore your registry to its state when you last successfully started your computer.

If all else fails, there is a file on your hard disk named SYSTEM.1ST that was created when Windows 95 was first successfully installed. If necessary you could also change the file attributes of this file from read-only and hidden to archive to copy the file to C:\WINDOWS\SYSTEM.DAT.

Windows NT
On Windows NT you can use either the "Last Known Good" option or RDISK to restore to registry to a stable working configuration.

How can I clean out old data from the Registry?
Although it's possible to manually go through the Registry and delete unwanted entries, Microsoft provides a tool to automate the process, the program is called RegClean. RegClean analyzes Windows Registry keys stored in a common location in the Windows Registry. It finds keys that contain erroneous values, it removes them from the Windows Registry after having recording those entries in the Undo.Reg file. You can download this free utility from our downloads page.

5/06/2007

Linux Online FAQ

What is Linux?
Linux is a Unix-like operating system originally developed by Linus Torvalds in 1991. To get the whole story, see our Page devoted entirely to this question.

Where can I get Linux?
here are literally hundreds of places you can get Linux because there are hundreds of "versions" or distributions of Linux. If you think you might want Linux because you're considering alternatives to Microsoft Windows or Macintosh OS for everyday computer use, you may want to check out a version of Linux called 'Knoppix', which will boot from your CD drive and does not need to be installed. If you're interested in Linux for other reasons, we invite you to look at our list of Linux distributions. You'll likely find what you're looking for there.

What is a Linux distribution?
A Linux "distribution" is version of the Linux operating system made especially by a company, organization or individual. The one thing they all have in common is that they use the Linux kernel. From there on, each developer will add its own programs, tools and other applications. Some are dedicated to specific uses while others are intended for the general public. Again, you'll find more information at our Linux distributions page.

Which Linux distribution do you recommend?
Linux Online tries to be impartial, particularly when it comes to for-profit, commercial distributions. We really don't recommend any one distribution over others. Also, there are so many factors to take into account when choosing a distribution that it would be impossible to make recommendations in general.

Can we have permission to use the Linux penguin logo?
Larry Ewing is the creator of the Linux penguin, Tux. Larry was kind enough to give free license to use it when he created it provided you give the correct attributions. If you're in doubt, please have a look at his website for more information. http://www.isc.tamu.edu/~lewing/linux/

Can you please forward this email/letter/gift/etc to Linus Torvalds?
Linus Torvalds does not work here at Linux Online so we don't handle any of Linus' correspondence. At present, he is working full-time on the kernel for the Open Source Development Labs. Please contact them if you need to get in touch with Linus or you wish to send him something. http://www.osdl.org/about_osdl/contact_osdl.html

Can you please send me Linux CDs?
Linux Online is a general information site about Linux. It is not a retailer of CDs, therefore we can't send you commercial versions of Linux. As far as non-commercial versions go, we do not have the staff and means to handle the enormous amount of potential requests for CDs. We do provide a list of retailers who can send you CDs of Linux distributions - some at very low cost.

Where can I find a driver for my hardware?
As Linux grows in popularity, it also gains support for a wider range of hardware. The Linux kernel now supports and enormous amount of hardware and most major Linux distribution incorporate this support into their products. You can also get hardware support by downloading, compiling and installing the latest version of the Linux kernel. In some cases, hardware manufacturers want to provide Linux support without incorporating their drivers into the kernel, so they provide separate drivers. If you're looking for these it's best to consult the manufacturer's website or send them an inquiry by email. Then there are some hardware manufacturers who don't support Linux, so no drivers are available. If you're already running Linux, it's best to check to see if new hardware you want to purchase is supported.

Can I run applications for MS Windows on Linux?
The short answer to this is: no, not automatically and not directly. That is to say, Microsoft Windows and Linux applications cannot run the same applications because they are not designed in the same way. However, there are some ways to run programs for Microsoft Windows on Linux using emulators and other means. If you need/want to run an application designed for Microsoft Windows on Linux, you might want to check out the following applications:
  • WINE
  • Crossover Products
  • Win4Lin
  • VMWare
What does GNU/Linux refer to?
NU/Linux is the name Richard Stallman, founder of the Free Software Foundation and the GNU project, and its supporters prefer over just Linux. They cite the fact that Linux could not have come into being without tools from the GNU project. Though this is true, use and custom has favored just Linux over GNU/Linux in the public consciousness. This website's use of the term Linux in no way tries to minimize the contributions of the Free Software Foundation. We feel that it's easier for people to identify the operating system by that simpler name and in the end, that helps in its adoption.

Is Linux a company?
There is no company called Linux. Linux is an operating system. There are many companies that develop Linux products and provide services based on Linux, but not one called Linux who "controls" the operating system.

Can I buy stock in Linux?
As we mentioned in the previous answer, there is no company called "Linux", so there can't be any stock in a non-existent company. However, several companies are publicly traded who do provide Linux products and services. Here are a few that directly produce the Linux operating system.
  • Novell (Symbol: NOVL)
  • Red Hat (Symbol: RHAT)
Companies like IBM and Hewlett-Packard have also put tremendous support behind Linux and they are publicly traded.

Who is SCO?
SCO or officially The SCO Group is the latest incarnation of what was founded as Caldera, formerly a Linux distribution company. In 2000, Caldera bought the Unix division of a company known as the Santa Cruz Operation (or SCO) and apparently acquired some rights to distribute the Unix operating system. New management took over at Caldera in 2002 and in early 2003, members of this new management team decided to abandon development of their Linux distribution and in a remarkable about-face, filed suit against IBM alleging that the computing giant had put Unix technology, which it claims it controls, into the Linux kernel in violation of contractual obligations. Caldera shortly after the suit was filed, officially changed their name to The SCO Group and is popularly known as SCO. This has since blown up into a huge controversy. For more information, see our page dedicated to the SCO case.

Does SCO own Linux?
They would like you to believe that they do. They will even sell you a Linux license under the threat that if you don't, they could sue you. However, we believe this is a lot like a paternity suit, just a bit more complicated.

4/06/2007

New Specs for Next-Generation Blu-ray Players

Blu-ray Disc Association clarifies what new specs, due later this year, mean for owners of current Blu-ray players.
Reports that your newly purchased Blu-ray Disc player will be obsolete by October are greatly exaggerated.
While it is true that the Blu-ray Disc Association recently set new minimum specifications for players produced after October 31--as we first outlined in our "High-Def Video Superguide"-those specifications only expand on the capabilities already present in existing players.
I spoke with Andy Parsons, chair of the U.S. promotion committee for the Blu-ray Disc Association, to clarify some of the common misconceptions.
All current Blu-ray Disc players support the BD-Java spec. (BD-Java is the programming language used to design the menus and present interactive content on a Blu-ray Disc.) In fact, says Parsons, this was a requirement from the get-go: "All players introduced since day one must support BD-Java."
Already, movie titles like Chicken Little and The League of Extraordinary Gentlemen are taking advantage of BD-Java's capabilities; in both of those cases, the movie discs offer interactive games.
If BD-Java is shipping today, why the confusion? "This fall," explains Parsons, "is the end of a grace period. Any new Blu-ray Disc player model introduced after October 31 must now fully comply with the full range of existing Blu-ray Disc player specifications."

Blu-ray's New Specs
The new specification requirements will enable many cool, long-promised Blu-ray Disc features that will boost Blu-ray's competitiveness in the interactivity realm with archrival HD DVD on players produced after the October 31 deadline.
These features include mandatory minimum storage requirements of 256MB for stand-alone players and 1GB for BD Live-connected players. (BD Live players can download additional entertainment content from the Internet, and will also require an ethernet connection.) All players will also need to support on-demand picture-in-picture via a secondary video stream (which could be accomplished via one video decoder or two, depending on how the real-time video is encoded); in addition, the players must support secondary audio mixing for mixing sound effects generated within the player with the soundtrack of the film.
"What's caused the confusion is that BD-Java will be utilized to implement these new capabilities. It's not that this is a new version of Java, it's just the code that will be used to run these features," Parsons says.

HD DVD's Requirements
In contrast, HD DVD already has a minimum storage requirement of 128MB of memory, an ethernet connection for connected interactivity, and a secondary video stream for on-demand picture-in-picture video. The memory requirement enables HD DVD players and titles to support persistent bookmarks that can stay in your player's memory, even after you eject the disc. And some titles, such as Mission: Impossible III, already have picture-in-picture director commentaries that you can activate at any time during the playback of the movie.
Parsons notes that these new capabilities "are not make-or-break features. Picture-in-picture is nice for on-screen directory commentaries and the like. But the fundamental functions of a Blu-ray player are already available in existing players.
"And," he stresses, "your existing Blu-ray player will continue to play future titles as it does today."

What Current Players Won't Do
Current Blu-ray players won't be able to play an on-demand picture-in-picture commentary, for example, that may come on a disc a year from now. Nor will they be able to connect to the Internet for future interactive functions that may be incorporated into the disc. But when that happens, Hollywood studio technologists have explained to me, they will likely program the disc in such a way that--if your player can't support the new feature--the option won't even show as available during playback.
The one possible exception to this among the currently shipping players: Sony's PlayStation 3, which ranked fourth in our recent high-definition player roundup. For one thing, the PS3 meets the technical requirements for BD Live Internet connectivity. According to Sony, the company is investigating and evaluating the implementation of BD Live, but it has not yet made any announcements of adopting and supporting BD Live.

2/25/2007

5 Windows Vista Tips

Access More Media with Spotlight.
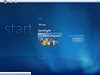
Almost all versions of Windows Vista come with enhanced Windows Media Center functionality, which allows you to create, store, organize, edit, and view personal and public media. The Start menu choices in Windows Media Center in Windows Vista are Pictures + Video, Movies, TV, Music, Spotlight, Tools, and Tasks. If your computer is outfitted with the proper hardware, you can turn your PC into a complete home theater system, including a DVD player and recorder, a movie theater, a movie studio, a television, a personal video recorder, a jukebox, a music server, and a photo library.
One feature of Windows Media Center really stands out for me though: the Spotlight. As you can see below, there are currently two choices under Spotlight, More Programs and Online Spotlight. From More Programs, you can play games such a s Chess Titans, Spider Solitaire, and FreeCell, or select Online Spotlight to gain access to online media. You can also add applications or services to your More Programs area for easy discoverability.
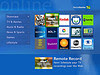
In the following image, you can see Online Spotlight in Windows Media Center. As you move the mouse—or click with your remote control—over each choice, the icon comes to the forefront and an explanation is offered regarding what the service or choice actually does. In this example, you can use MSN Remote Record Service to schedule your TV recordings from anywhere in the world, as long as you have access to the Internet! This particular group of icons is available from Showcase. Here are a few more things you can do with Online Spotlight, including but not limited to:
  • Access free television shows, Internet radio, news, movie trailers, podcasts, and videos from AOL, Yahoo!, Reuters, MSN TV Today, and ABC.
  • Download and purchase movies and TV content through subscription services such as Movielink, TVTonic, CinemaNow, and Comedy Central. The following figure shows Movielink.
  • Purchase, Save, and/or Play Music from Napster, Satellite Radio, and MTV Overdrive and from VH1, MusicMatch, and Live365.com.
  • Share photos with Kodak Share and view image collections from Gallery Player.
  • Play games alone or with others from Gaming on Demand and DISCover Games.
  • Burn DVDs of your favorite TV shows from PrimeTime and ARcSoft QuickDVD.
Spotlight makes it clear though: If you've been putting off getting an "always on" connection to the Internet, now's the time. Windows Media Center in Windows Vista will work to its full potential if an always-on connection is available.

View and Manage Pictures and Videos with Photo Gallery
Check out the new Photo Gallery in Windows Vista. You can sort pictures and videos by keywords, tags, the date the pictures or video were taken, ratings, and other metadata. You can even create Search Folders that contain up-to-date and "live" data, which changes each time you open the folder. You can create your own metadata to totally organize your photos and videos using any type of organizational set you'd like.
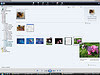
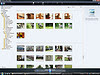
Windows Photo Gallery is shown here with March 2006 selected for viewing, and the image of the dog is highlighted. In using the hover preview, notice how the image comes to the forefront and information about the image is shown. I prefer to sort my photos by their folder names. As you can see in the next image, there are multiple named folders and subfolders. Selecting any folder on the left produces its contents on the right. Using the mouse to hover over any picture offers information about that picture as well. In this image, the folder My Pictures is selected, and two of the subfolders are showing, Nikko and Photo Album. On the right side, you can see there are 719 photos in the My Pictures folder.
If you choose to sort folders by name, organize your images by subject such as Home, Weddings, Vacations, Friends, Family, Special Events, and Pets, and create subfolders for each. You can then browse images by their subject category. Because images from digital cameras automatically register the date taken in the metatag, it's just as easy to then organize the images by date taken. You can do this with a simple click of the mouse.

Improve Your Media Experience with Windows Media Player 11
Windows Media Player 11 is another new feature included in Windows Vista. Windows Media Player 11 has a deeply integrated music library for both online and offline content, with an interface that looks more like a Web site than computer application. And with a new integrated feel, Windows Media Player 11 makes online, network, and offline content indistinguishable. Windows Media Player 11 also connects to additional hardware easily and offers easy-to-use tools for following the process of any task (downloading music, burning CDs, synching music, or streaming video, just to name a few). You can learn more about Windows Media Player 11 at this Windows Vista Community Web page.

One of my favorite additions to Windows Media Player 11 is the Global and Sync Status tools. In older versions of Windows Media Player, you never really knew what was going on during a task. Isn't buffering finished yet? How's that sync going? Will all of this fit on a CD? And which songs can I put on there, based on the song's license? And, of course, why won't this song sync to my MP3 player? Windows Media Player 11 has ended these aggravations with Global Status and Sync Status.

In addition to the new status features, there are new search features too. With WordWheel, for instance, you can type part of the artist's name, song title, or genre—whatever you can remember—into the Search bar. The Library "prunes" through your entire collection with a query across relevant fields and offers up what options most closely relate to your entry. Here's an example. I've typed PA in the Search bar and selected Artist. There are four artists in my library whose name begins with Pa. The more letters I type, the shorter the list gets. It's a "smart" search and will change the way to locate data, including all media, on your computer forever.

Organize and Find Data with New Search Tools

Speaking of new search features—using Search Tools and Search Folders you can locate all of the data on your PC, including the data you have in Windows Mail, Windows Media Player 11, Windows Photo Gallery, and your personal files and folders quickly and easily. No more having to remember where you've stored a file. Those days are over. Now, you only need to remember something about what you're looking for, such as a word contained in a document, part of the title of a song or album, or the month or day a picture was taken. This search feature provides the same functionality detailed in the previous section.

You can also help the new Search Tools provide more accurate results by adding your own tags to data. For example, you can add a keyword to all documents related to a specific project after you save them to your computer. Later, just search for the project keyword in the Quick Search box on the Start menu, and all the project-related pictures will be displayed. This search works with any type of data, including music, pictures, and videos.

Another new search tool in Windows Vista is Search Folders. An easy way to get started with Search Folders is to click Start, and then click Search. The Search window opens, and you will type your search keyword(s). You can then save that search to your hard drive. That Search Folder becomes an excellent tool for finding up-to-date information about the files on your computer that you create, save, and search for often. Opening a saved Search Folder instantly runs that saved search again (behind the scenes), displaying brand new results immediately. Here's an example:

In this image, I've searched for "Jennifer." The search results include a contact, an Office Word document, a folder, several images, a Journal page, and a shortcut. Now all I have to do is click the item and gain access. As shown on the left side of this image, a Saved Searches folder also exists. When you click that folder you can see all of your saved searches as well as default saved search folders. The default folders are already set up and include automatic searches for Last 7 Days E-Mail, Favorite Music, Last 30 Days Documents, and more. As noted earlier, these new search features will change the way you use your computer forever.

Manage Your PC with New Choices in Control Panel
The Control Panel in Windows Vista offers many new features too, as you can see in the screenshot below. Although each of the new items in Control Panel merit their own stand-alone articles, I'll introduce a few of the new items briefly.
New Control Panel items include:
  • Network Center. You can use this feature to view your Network Map and uncover connectivity problems, configure basic security settings, and view network details.
  • Parental Controls. You can use Parental Controls to enable, configure, and manage the new parental controls in Windows Vista.
  • Pen and Input Devices. You can use this feature to configure and manage alternate input devices including pens and input panels.
  • Sidebar Properties. With this feature, you can configure and manage how the Windows Vista sidebar appears on the interface.
  • Sync Center. You can use Sync Center to manage synched hardware such as PDAs, portable media players, and other devices.
  • Text to Speech. With Text to Speech, you can set up, train, and run speech recognition, and to configure and run text to speech translation.
  • Windows Defender. With this functionality, you can check for unwanted or harmful software, scan your computer, view quarantined items, and visit the Windows Defender Web site.
  • Windows SideShow. You can use the Windows SideShow to connect a secondary display that accesses information like e-mail or media from a mobile phone or other mobile device. And you can use Windows SideShow to check your mail while you are away from your computer.
Windows Vista truly is a giant leap into the technological future. Beyond the sleek, new, Web-like interface, new Windows Media Center 11 features, the increased security, hands-off approach to keeping your computer safe, and Windows Vista ease-of-use, there are a thousand things to keep you electrified, excited, and enthused. Just be careful, you may end up like me, doing more playing than working!

2/15/2007

Tighten Microsoft Windows to Improve Security

Windows has security holes. Microsoft Windows XP Service Pack 2 (released in August 2004) is much more secure than Windows XP-SP1, XP, 2000, ME, 98 or 95. For an introduction to Internet security for home and SOHO end users, see our Overview page. For this week's top Internet security and privacy topics, see our Newsletter page.
  • Upgrade to Windows XP Service Pack 2. Turn on automatic updates and turn on the Windows firewall (until you replace it with a better one). Turn off file and printer sharing if you do not use these features. If you want or need to do a clean install, see our Installation page.
  • Replace Internet Explorer with Firefox and Outlook Express with a more secure email client like Thunderbird. Also consider signing up with an ISP and/or email service that provides online spam, virus and content filters for two levels of protection, see our Broadband and Secure Website & Email Hosting pages.
  • Turn off the Windows XP firewall and replace it with software and hardware firewalls for two levels of protection, see our firewall software, wired and wireless router pages. Be sure to test them after installation, see our testing page.
  • Install anti-virus and anti-spyware software. Also consider using anti-trojan, anti-spam, anti-phishing and privacy software. Turn on automatic updating and/or check for updates of malware definition files yourself at least once a week.
  • Tighten Windows Checklist for Securing Windows XP Pro, Lawrence Berkeley Nat'l Lab
    TomCat's Secure Your Home Computer
    Securing Windows XP, Wall & Vaughan, TweakHound
    Windows XP Security Checklist, LabMice.net
    Consider using a product like the Computer Security Tool to help you tighten Windows (trial version available).
  • Backup your files at least weekly including documents, music, photos...
  • If you are using a dial-up Internet connection, consider moving to DSL or cable to make it easier and faster to use the automatic update features of Windows, anti-virus, and other security and privacy software.

Thank for Home PC Firewall Guide.

2/04/2007

Top 10 tweaks tips and tricks for windows vista

  • If you’re annoyed by Internet Explorer’s incessant barking that you’ve lowered your security settings (like, if you’re a non-paranoid expert), launch “gpedit.msc” from either the Run command or Start Search field, navigate through Local Computer Policy / Computer Configuration / Administrative Templates / Windows Components / Internet Explorer. In the rightmost pane, double-click “Turn off the Security Settings Check feature” and set it to Enabled.
  • If Internet Explorer’s Information Bar also annoys you, you can turn it off (again) in the Group Policy Object Editor (gpedit.msc) through Local Computer Policy / Computer Configuration / Administrative Templates / Windows Components / Internet Explorer / Security Features. In the rightmost pane, double-click “Internet Explorer Processes” and set it to Disabled. Hallelujah!
  • I’ve just mentioned two tweaks that are buried inside the Group Policy Editor. Jim Allchin pointed out that there’s a Group Policy Settings Reference spreadsheet available. Makes for great weekend reading.
  • Read the Background on Backgrounds if you’re a performance junkie. Don’t set your wallpaper through Internet Explorer ever again! Now that Windows supports JPG wallpapers, there’s absolutely no need (or excuse) for using BMPs anymore.
  • If you insist on keeping UAC (User Account Control) turned on for yourself, you might care to make the elevation prompts a bit less visually jarring. Brandon told me about this one, even though I have UAC turned off. Launch the Local Security Policy manager (secpol.msc), and navigate through Security Settings / Local Policies / Security Options. In the rightmost pane, scroll to the bottom and double-click “User Account Control: Switch to the secure desktop when prompting for elevation.” Disable it, and you can keep UAC turned on without getting turned off by the embarrassingly craptacular Aero Basic theme.
  • Vista can send you emails! The Computer Management tool can still be accessed by right-clicking “Computer” and selecting “Manage” from the menu. However, now you can attach a task to any event. Try navigating through System Tools / Event Viewer / Windows Logs / Application. Now, go ahead and select an event - then look to the rightmost pane and click “Attach Task to This Event.” Name it whatever, describe it however, click through the next step, then in the Action step, you’ll see the “Send an e-mail” option.
  • The Windows Task Manager gives you a lot more troubleshooting information in Vista. Flip to the Processes tab, and in the View menu, click “Select Columns” and add Description, Command Line, and Image Path Name. Moreover, when you right-click a process, you can select either “Go to Service(s)” or “Open File Location.” These are all long overdue options.
  • This one’s interesting. Open up the Date and Time Control Panel applet. Flip to the “Additional Clocks” tab. There, you can configure two more clocks from different time zones. They’ll appear in the tooltip when you hover over the Taskbar clock. No additional software (or silly sidebar widgets) necessary.
  • Applicable in other versions of Windows, I’m going to throw it in here for good measure. Create a shortcut to RegSvr32.exe in your SendTo folder. To get there quickly, enter “shell:sendto” in the Run command dialog or Start Search field. Now, when you wanna register a DLL or OCX file with the system, you can select it/them and “Send To” the RegSvr32 shortcut.
  • I figured I’d round out my first set of Windows Vista tips and tricks with a tiny bit of eye candy. It doesn’t beat Picasa, but the Windows Photo Gallery is better than nothing. Once it’s indexed all your photos, click the icon next to the Search field and turn on the “Table of Contents.” That’s kinda nifty.

Thanks Chris for this great finding on Windows Vista!

1/18/2007

Useful Run Commands

Following are the most easiest and accurate RUN COMMANDS. It does save the time and increase work efficiency. Please use it more frequently...


  • Accessibility Controls : access.cpl
  • Accessibility Wizard : accwiz
  • Add Hardware Wizard : hdwwiz.cpl
  • Add/Remove Programs : appwiz.cpl
  • Administrative Tools : control admintools
  • Adobe Acrobat (if installed) : acrobat
  • Adobe Designer (if installed) : acrodist
  • Adobe Distiller (if installed) : acrodist
  • Adobe ImageReady (if installed) : imageready
  • Adobe Photoshop (if installed) : photoshop
  • Automatic Updates : wuaucpl.cpl
  • Bluetooth Transfer Wizard : fsquirt
  • Calculator : calc
  • Certificate Manager : certmgr.msc
  • Character Map : charmap
  • Check Disk Utility : chkdsk
  • Clipboard Viewer : clipbrd
  • Command Prompt : cmd
  • Component Services : dcomcnfg
  • Computer Management : compmgmt.msc
  • Control Panel : control
  • Date and Time Properties : timedate.cpl
  • DDE Shares : ddeshare
  • Device Manager : devmgmt.msc
  • Direct X Control Panel (If Installed)* : directx.cpl
  • Direct X Troubleshooter : dxdiag
  • Disk Cleanup Utility : cleanmgr
  • Disk Defragment : dfrg.msc
  • Disk Management : diskmgmt.msc
  • Disk Partition Manager : diskpart
  • Display Properties : control desktop
  • Display Properties : desk.cpl
  • Display Properties (w/Appearance Tab Preselected) : control color
  • Dr. Watson System Troubleshooting Utility : drwtsn32
  • Driver Verifier Utility : verifier
  • Event Viewer : eventvwr.msc
  • Files and Settings Transfer Tool : migwiz
  • File Signature Verification Tool : sigverif
  • Findfast : findfast.cpl
  • Firefox (if installed) : firefox
  • Folders Properties : control folders
  • Fonts : control fonts
  • Fonts Folder : fonts
  • Free Cell Card Game : freecell
  • Game Controllers : joy.cpl
  • Group Policy Editor (XP Prof) : gpedit.msc
  • Hearts Card Game : mshearts
  • Help and Support : helpctr
  • HyperTerminal : hypertrm
  • Iexpress Wizard : iexpress
  • Indexing Service : ciadv.msc
  • Internet Connection Wizard : icwconn1
  • Internet Explorer : iexplore
  • Internet Properties : inetcpl.cpl
  • Internet Setup Wizard : inetwiz
  • IP Configuration (Display Connection Configuration) : ipconfig /all
  • IP Configuration (Display DNS Cache Contents) : ipconfig /displaydns
  • IP Configuration (Delete DNS Cache Contents) : ipconfig /flushdns
  • IP Configuration (Release All Connections) : ipconfig /release
  • IP Configuration (Renew All Connections) : ipconfig /renew
  • IP Configuration (Refreshes DHCP & Re-Registers DNS) : ipconfig /registerdns
  • IP Configuration (Display DHCP Class ID) : ipconfig /showclassid
  • IP Configuration (Modifies DHCP Class ID) : ipconfig /setclassid
  • Java Control Panel (If Installed) : jpicpl32.cpl
  • Java Control Panel (If Installed) : javaws
  • Keyboard Properties : control keyboard
  • Local Security Settings : secpol.msc
  • Local Users and Groups : lusrmgr.msc
  • Logs You Out Of Windows : logoff
  • Malicious Software Removal Tool : mrt
  • Microsoft Access (if installed) : access.cpl
  • Microsoft Chat : winchat
  • Microsoft Excel (if installed) : excel
  • Microsoft Frontpage (if installed) : frontpg
  • Microsoft Movie Maker : moviemk
  • Microsoft Paint : mspaint
  • Microsoft Powerpoint (if installed) : powerpnt
  • Microsoft Word (if installed) : winword
  • Microsoft Syncronization Tool : mobsync
  • Minesweeper Game : winmine
  • Mouse Properties : control mouse
  • Mouse Properties : main.cpl
  • Nero (if installed) : nero
  • Netmeeting : conf
  • Network Connections : control netconnections
  • Network Connections : ncpa.cpl
  • Network Setup Wizard : netsetup.cpl
  • Notepad notepad Nview Desktop Manager (If Installed) : nvtuicpl.cpl
  • Object Packager : packager
  • ODBC Data Source Administrator : odbccp32.cpl
  • On Screen Keyboard : osk
  • Opens AC3 Filter (If Installed) : ac3filter.cpl
  • Outlook Express : msimn
  • Paint : pbrush
  • Password Properties : password.cpl
  • Performance Monitor : perfmon.msc
  • Performance Monitor : perfmon
  • Phone and Modem Options : telephon.cpl
  • Phone Dialer : dialer
  • Pinball Game : pinball
  • Power Configuration : powercfg.cpl
  • Printers and Faxes : control printers
  • Printers Folder : printers
  • Private Character Editor : eudcedit
  • Quicktime (If Installed) : QuickTime.cpl
  • Quicktime Player (if installed) : quicktimeplayer
  • Real Player (if installed) : realplay
  • Regional Settings : intl.cpl
  • Registry Editor : regedit
  • Registry Editor : regedit32
  • Remote Access Phonebook : rasphone
  • Remote Desktop mstsc / Removable Storage : ntmsmgr.msc
  • Removable Storage Operator Requests : ntmsoprq.msc
  • Resultant Set of Policy (XP Prof) : rsop.msc
  • Scanners and Cameras : sticpl.cpl
  • Scheduled Tasks : control schedtasks
  • Security Center : wscui.cpl
  • Services : services.msc
  • Shared Folders : fsmgmt.msc
  • Shuts Down Windows : shutdown
  • Sounds and Audio : mmsys.cpl
  • Spider Solitare Card Game : spider
  • SQL Client Configuration : cliconfg
  • System Configuration Editor : sysedit
  • System Configuration Utility : msconfig
  • System File Checker Utility (Scan Immediately) : sfc /scannow
  • System File Checker Utility (Scan Once At Next Boot) : sfc /scanonce
  • System File Checker Utility (Scan On Every Boot) : sfc /scanboot
  • System File Checker Utility (Return to Default Setting) : sfc /revert
  • System File Checker Utility (Purge File Cache) : sfc /purgecache
  • System File Checker Utility (Set Cache Size to size x) : sfc /cachesize=x
  • System Information : msinfo32
  • System Properties : sysdm.cpl
  • Task Manager : taskmgr
  • TCP Tester : tcptest
  • Telnet Client : telnet
  • Tweak UI (if installed) : tweakui
  • User Account Management : nusrmgr.cpl
  • Utility Manager : utilman
  • Windows Address Book : wab
  • Windows Address Book Import Utility : wabmig
  • Windows Backup Utility (if installed) : ntbackup
  • Windows Explorer : explorer
  • Windows Firewall : firewall.cpl
  • Windows Magnifier : magnify
  • Windows Management Infrastructure : wmimgmt.msc
  • Windows Media Player : wmplayer
  • Windows Messenger : msmsgs
  • Windows Picture Import Wizard (need camera connected) : wiaacmgr
  • Windows System Security Tool : syskey
  • Windows Update Launches : wupdmgr
  • Windows Version (to show which version of windows) : winver
  • Windows XP Tour Wizard : tourstart
  • Wordpad : write

The above trick is taken from 156Useful run command. Thanks for this great finding!

1/14/2007

Windows Vista FAQ?

When was Vista originally supposed to ship?
Initial scuttlebutt had it that Windows XP's successor would arrive in 2003, and would be a modest update to fill time between XP and "Blackcomb," which was supposed to be the big-deal XP replacement. Then Microsoft announced that the supposedly minor upgrade, code-named "Longhorn," would appear in late 2004. This was followed by slippage and more slippage, most famously in March 2006, when the company announced that Vista wouldn't appear in a consumer version--or preinstalled on new PCs--until early 2007.

When is it finally coming out?I hear dates ranging from November 30 to January 30.
Unlike previous Windows launches, Vista's debut has been divided into two extravaganzas, presumably in part because the upgrade will miss the holiday 2006 season due to scheduling delays.
On November 30, Microsoft unveils the corporate version of the new OS (and Office 2007), and companies with volume license agreements will theoretically be able to get Vista right then and install it on PCs they already own.
But the bigger Vista rollout can't happen until Microsoft duplicates millions of DVDs, puts them in boxes, and ships them to retailers--and until PC companies design, manufacture, and ship systems with Vista preinstalled. So for home users, small businesses, and anyone who wants to buy a new Vista PC, the date that matters is January 30. That's when Vista will officially be launched as a consumer product.

Why the name "Windows Vista"?
Back in July 2005, when the name was announced, Windows director of product development Brad Goldberg told News.com that the name was the result of eight months of research into words that convey a sense of clarity. It's supposed to refer to the upgrade's focus on information management, security, and easy connectivity. Plus, Moon Pie was already taken.

On the continuum of Windows upgrade importance from Windows 95 (a giant leap forward) to Windows Me (a step backward), where does Vista belong?
Somewhere in the middle: Call it a medium-size stride in the right direction. In terms of new features, it offers lots of small yet worthwhile improvements - but no breakthroughs. On the other hand, if the upgrade's new emphasis on security makes it less susceptible to viruses, spyware, and hacker attacks, that would be a strong argument in its favor.
Windows Vista offers better support than XP for today's powerful hardware, such as 64-bit CPUs and cutting-edge graphics cards, providing the structural basis for potent applications that could never have been written for Windows XP. As those applications begin to appear, Vista should grow into a more compelling upgrade than it is on day one.

How does Windows Vista stack up against the most recent Apple OS?
In our 2005 World Class Awards, we named Apple's OS X 10.4 ("Tiger") the third-best product of the year, while Windows XP wasn't mentioned at all. But Windows Vista at least narrows the gap between operating systems that hail from Redmond and Cupertino. In part this is because Vista adds so many features - from decent integrated search to Gadgets (aka Widgets) to fancy 3D effects - that Tiger already has.
With Leopard, the next generation of OS X, due out next spring, Mac owners will get some new features that may put Windows users farther back in their rear-view mirrors. For instance, judging from previews, Leopard's Time Machine continuous-backup utility may be superior to Vista's Backup, System Restore, and Previous Versions data-recovery features.

What are Windows Vista's system requirements?
That depends. To run Windows Vista Home Basic, the minimums are an 800-MHz or faster processor, 512MB of memory, graphics hardware capable of SVGA (800 by 600) resolution, a 20GB hard disk with at least 15GB of free space, and a CD-ROM drive (though you'll have to request a set of installation CDs from Microsoft if your system lacks a DVD drive). If you want Vista's Aero interface (and you do), you'll need a graphics card that can handle DirectX 9 graphics APIs with Pixel Shader 2.0 3D texturing, has a Windows Vista Display Driver Model (WDDM) driver and at least 128MB of graphics memory, and supports 32 bits per pixel.

Are there any tools to help me figure out whether my PC is up to the job?
Your first stop should be PC Pitstop's Vista Readiness test, which runs right in your browser (Internet Explorer required) and offers a brief comparison of your system's hardware to Vista's minimum and recommended system requirements. Microsoft's own Windows Vista Upgrade Advisor provides a more thorough assessment. After you download and install the program, it scans your system and prepares a report analyzing your system's basic hardware compatibility (CPU, memory, and disk space), and detailing whether your installed applications and drivers will work with Vista.

Can I upgrade my existing Windows installation to Windows Vista, or do I have to back up my data and reinstall from scratch?
Whether or not you perform an in-place upgrade (where Vista replaces your existing operating system, but leaves your current files and installed programs in place), you should back up your data first. You can always perform a clean installation (where you begin by wiping the hard-disk partition and its contents clean). This is often the best choice - first because it may be faster than upgrading (even if you include restoring data files and reinstalling applications), and second because it minimizes problems and conflicts stemming from old applications and drivers. In-place upgrades may be more convenient, but you can't upgrade every existing Windows version in-place. Our feature article "Everything You Need to Know About Windows Vista" includes a chart that lists which versions can be upgraded in place.

Can I back out of an installation?
If you upgrade over a previous version of Windows and the upgrade fails (as several of ours did), Windows Vista will restore your previous version of Windows automatically. Once Vista is installed, though, there is no easy way to return to your previous operating system.

Can I install Windows Vista on a system that doesn't have a DVD drive?
Yes, but you'll have to request replacement installation CDs from Microsoft. As we went to press, the company hadn't yet determined their price or the method by which customers could request the CDs.

What about product activation--any changes from the version that XP uses?
Microsoft's product activation--software that profiles your system's hardware and uploads a fingerprint-like profile to a database maintained by the company--is alive and well, and in Vista it isn't optional. Microsoft can change the stringency of its product activation system, but rest assured that the company will be checking to make sure that you don't install your copy of Windows Vista on more than one PC at a time.

What's next after Vista?
We don't know many details. The next major version of Windows, once dubbed "Blackcomb," is now known as "Vienna"; it's part of a series of Microsoft code names that refer to great cities of the world. As Wikipedia reports, rumors about this OS date to before the release of Windows XP, and include the possibility that it will introduce a completely new user interface with intriguing-sounding elements known as the GroupBar and the LayoutBar, as well as sandboxing technology designed to prevent rogue applications from having any impact on other programs.
When it will appear is anyone's guess, but Microsoft CEO Steve Ballmer has said that the more-than-five-year gap between Windows XP and Vista will never be repeated. If that's the rule, Vienna should arrive sometime before early 2012.

Whatever happened to WinFS?
WinFS was supposed to replace Windows' underlying file system with a database designed to make searching and sorting data immeasurably easier. Microsoft had to abandon the project, though, because it was just too tough to implement. The company doesn't like talking about WinFS these days. In fact, it seems unlikely that Microsoft will try to put it into the next version of Windows.

1/11/2007

Windows Vista Tip Sheet

Windows Vista Tip Sheet
Windows Vista is designed for businesses of all sizes and across all industries. Windows Vista will make a difference in any business setting. Windows Vista also helps PC users to be more effective in their work by offering improved connectivity with advanced integration across technologies, networks, and systems, as well as providing them with quick access to better organized information.

Tips & Tricks

Folder Navigation
1. Getting around your PC - Folders look visually different, but with more choices navigation is even easier. Using the Navigation pane you can visually see the folder hierarchy and quickly find your destination.
2. Address bar - The arrows on the Address Bar open a fly-out to specific folders on your PC or network.
3. Classic Menus – If need you can return to the classic views just hit the ALT key. However, stay with the Windows Vista default configuration for better productivity.

Running your Applications
1. Find them, and then run them – You might use the Start menu Search box to type an application’s name, and then press enter to run it, no need to go looking.
2. MS-DOS command prompts – Type ‘command’ in the Start menu Search box, press Enter and you can return to command land. You can also use the Start menu Search box in place of the Run dialog box.

Finding Your Files
1. Simple Search – Use the Start menu Search box to type part of a file’s name and see a list of the matching files. Use a similar Search box at the top right of every folder window to search down through subfolders.
2. Advanced Search – From the Start menu, choose Search, type what you need to find and Windows Vista will show you all the files matching your criteria.
3. Advanced Search Filters – Use + to add filters using keywords, author, title or just about any of the information available in properties.
4. Saved Search – A few clicks of the mouse and you can save a search to revisit later.

Control Panel
1. Search the Control Panel – Consistent with the other tools and folders, the Control Panel provides a Search box to quickly find available tools.
2. Classic View – Return to your glory days with just a click and you will find the familiar Control Panel View, however the updated Windows Vista Control Panel is so much more useful you may never need that Classic View.
3. Offline Files – Away from the network? You can take files with you and make sure you have the information you need.
4. Sync Center – Make sure you have the latest version of those offline files with the Sync Center; you can even make sure the files are up-to-date automatically and on a schedule.
5. Mobility Center – Windows Vista does a better job of collecting resources that are appropriate for certain tasks; the mobility center is just one example. Here you will manage the resources appropriate for laptops, such as battery status, wireless network, external monitor, and presentation settings.

Internet Explorer 7
1. IE Appearance – IE allows you to zoom in or out on web-pages – use Ctrl+(+) and Ctrl+(-), You can even generate a print preview that scales the page to your paper size.
2. Classic Menus – To stick with tradition, the ALT key or the Tools menu provides easy access to those familiar classic menus of IE.
3. Web Search – Use the search engine you prefer through one familiar search box, and change search providers on the fly from a handy drop-down menu.
4. Tabbed Browsing – How often do you open a number of web pages with a similar theme? Well you can group these together under the same Internet Explorer window with tabbed browsing. A simple ctrl-click will open a link in your current window to a new tab.
5. Quick Tabs – Once you have the tab group, Quick Tabs allows you to view all your tabbed pages as thumbnails, allowing you to quickly pick the page you want.
6. Favorites (Groups) – Favorites are even easier, and you can even save those same tab groups you created for later use. Simply use the star to access saved pages or tab groups, or + to add the page or tab group to favorites.

Changes to Discover
1. Windows Shared View – Windows Shared View is easier to connect with others, share information and collaborate on projects.
2. Windows Defender – To ease the worry about viruses and other malicious software, Windows Defender increases the security level for your PC.
3. Windows Sidebar – You will see a new generation of applications, more accurately called gadgets. These gadgets can be used on the desktop or with the Windows Sidebar, a desktop location or corral to access them. Turn off and start up more quickly. When you click the power button on the Start menu, Windows saves your work and programs just as they are, and then puts the computer to sleep. When you use Sleep, your computer typically wakes up in one or two seconds.

12/27/2006

5 Cool Windows XP Tips

Stretching the taskbar
Sometimes your taskbar gets a little tight and cramped for room. When this happens, give it a stretch.
First, unlock your taskbar by right-clicking the taskbar, and then clicking Lock the Taskbar if it is selected (this will un-select it). Scroll your mouse over the top edge of the taskbar until you see the vertical resize cursor (arrow pointing up and down). Click, hold and drag the top of the taskbar up. Isn't that better? Once you find a place where you like it, you should re-select Lock the Taskbar

Adding a special character
There are probably one or two special characters that you use regularly (for example, ® and ©). It can be a real time-waster to open your Character Map every time you want to insert one of these symbols. So don't! Open the Character Map by clicking Start, clicking All Programs, and then clicking Accessories. Click System Tools, and then click Character Map. Click the © symbol. Notice that the bottom-right corner of the Character Map shows the keyboard shortcut used to insert the special character. Write it down for later use. When you want to insert that character, here's the trick: Position the cursor where you want to insert the special character, then with NUM LOCK key on, hold down the ALT key and use the number pad keys to type the character value.
Open files with one click
It just makes sense that if you can do the same thing in Windows with a single click of the mouse that you can do with two clicks, you'd take the shorter route, right?
If you want to change your two clicks to one, click Start, click My Computer. Under the Tools menu, click Folder Options. Now click the General tab in the dialog box, click Single-click to open an item (point to select), and then click OK. This makes everything in Windows exactly one click faster.
Change your pointer scheme
The first thing I do when I get a new computer is head straight for the cursors and change them. It's not that the default ones are bad; I've just been using the same ones forever and I'm not comfortable using anything else. If you want to change your pointer scheme, click Start, and then click Control Panel. In Category View (vs. Classic View) click on Printers and Other Hardware, and then click on Mouse. Click the Pointers tab and browse the available themes. Select the one that suits you best, and then click OK.
Change the power button
I rarely ever shut down my computer; instead, I tend to put my system into stand by mode. Here's a clever way to speed up this task and make your computer's power button put your computer into stand by for you. Click Start and open the Control Panel. In Category View, click Performance and Maintenance, and then click Power Options. In the Power Options Properties dialog box, click the Advanced tab. Under Power Buttons, select Stand by in the When I press the power button on my computer area, and then click OK. Now, when you push your computer's power button, your system will immediately go to stand by.